
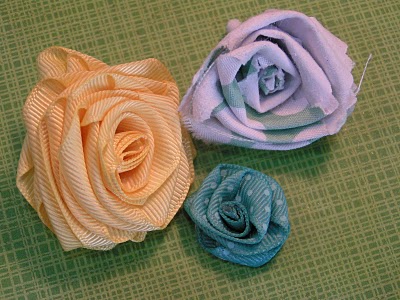
Jennifer, our guest designer recently learned one technique to make ribbon rose flowers. She shared the tutorial with her readers over at http://www.theeverydayscrapper.com and wanted to give a little love to our followers as well. Jennifer says they are easy to make and like Simon Cowell says, gives any project that "WOW" factor. Thanks Jennifer, we can't wait to try these ribbons.

Supplies Needed:
•Ribbon, about 1 yard
•Glue Gun and/or Fabri-Tac adhesive
•Gems or Buttons (optional)
Assembly:

Step 1
Roll one end of the ribbon into a tube, about 3 layers of ribbon thick.
Secure with a little glue if you like.

Step 2
Fold the ribbon to the outside and start wrapping around the tube.
Continue folding back the ribbon every 1/2 turn or so.
You should see the rosebud starting to form.
*The following photos displays how the flower should look after each several rotations.


Step 3
Continue with your ribbon until the end or until it looks full.

Step 4
Turn the rose over and secure the back with glue.
Putting glue under the folds if need be.
You don’t wanna do all that work and then have the rose fall apart.
Step 5
Add buttons or gems to the center of your rose if you like.
Add to your project.

Awesome tutorial... I love the finished project!!! TFS
ReplyDeleteWonderful these roses are just wonderful, thanks for sharing your technique.
ReplyDeleteWhat a great tutorial. Thank you for sharing your technique with us. Have a blessed weekend.
ReplyDeletei am a visual learner so photos are key to my learning about different techniques. i love the results, i may try this idea for wrist corsages for our graduates so they have a long term memento of their special day! our students are all developmentally delayed and many with physical disabilities, and for their grad day we want to give them a lasting reminder of their school days with scrapbooks and these roses could also be added to the covers!
ReplyDelete